

Company News


Detailed explanation of solar inverter battery connection method
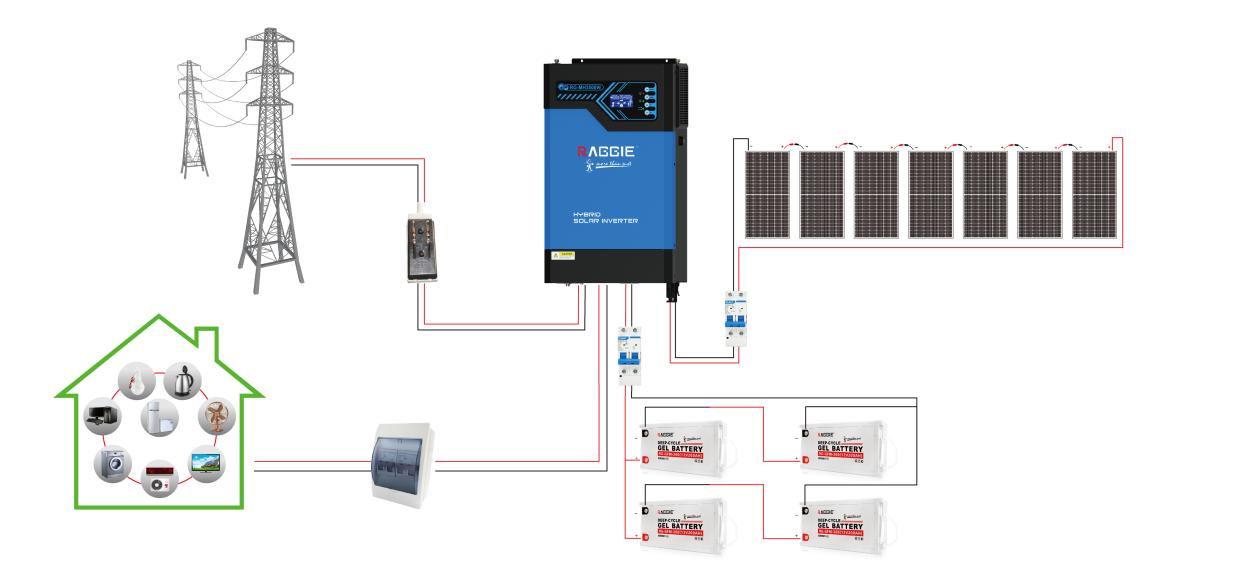
1. Parallel connection method
1. Confirm battery parameters
Before making parallel connections, you need to confirm whether the voltage and capacity of the batteries are the same, otherwise the output voltage and power of the inverter will be affected. Generally speaking, solar inverters need to use 12-volt batteries with a capacity between 60-100AH.
2. Connect the positive and negative poles
Connect the positive and negative terminals of the two batteries together, that is, connect the positive terminals of the two batteries together through the connecting wire, and connect the negative terminals of the two batteries together in the same way.
3.Connect to the inverter
Connect the batteries connected in parallel to the DC port of the solar inverter. After connecting, check whether the connection is stable.
4. Verify output voltage
Turn on the solar inverter and use a multimeter to check whether the voltage output by the inverter is about 220V. If it is normal, the parallel connection is successful.
2. Series connection method
1. Confirm battery parameters
Before connecting in series, you need to confirm whether the voltage and capacity of the batteries are the same, otherwise the output voltage and power of the inverter will be affected. Generally speaking, solar inverters need to use 12-volt batteries with a capacity between 60-100AH.
2. Connect the positive and negative poles
Connect the positive and negative poles of the two batteries through connecting wires to achieve a series connection. Note that when installing the connecting cable, you must first connect the positive pole of one battery to the negative pole of another battery, and then connect the remaining positive and negative poles to the inverter.
3. Connect to the inverter
Connect the batteries connected in series to the DC port of the solar inverter. After connecting, check whether the connection is stable.
4. Verify output voltage
Turn on the solar inverter and use a multimeter to check whether the voltage output by the inverter is about 220V. If it is normal, the series connection is successful.
3. Solutions to common problems
1. Battery connection reversed
If the battery connection is reversed, the inverter will not work properly. Disconnect from the inverter immediately and follow the normal sequence when reconnecting.
2. Poor contact of the connecting wire
Poor contact of the connecting wire will affect the output voltage and power of the inverter. Check whether the connection of the connecting wire is firm, re-confirm and reinforce the connecting wire.
3. The battery is too old or has been used for a long time
Long-term use or aging of solar panels may cause the battery capacity to become smaller and the batteries need to be replaced. At the same time, it is also necessary to check whether the solar panels have been damaged. If the panels are found to be cracked or damaged, they need to be replaced in time.
In short, correct connection methods and precautions will make the inverter connection safe and reliable and ensure the normal use of solar panels. During use, you also need to pay attention to the charging and discharging of the battery to avoid overcharging or overdischarging, so as to bring better results and longer service life to the use of solar inverters.